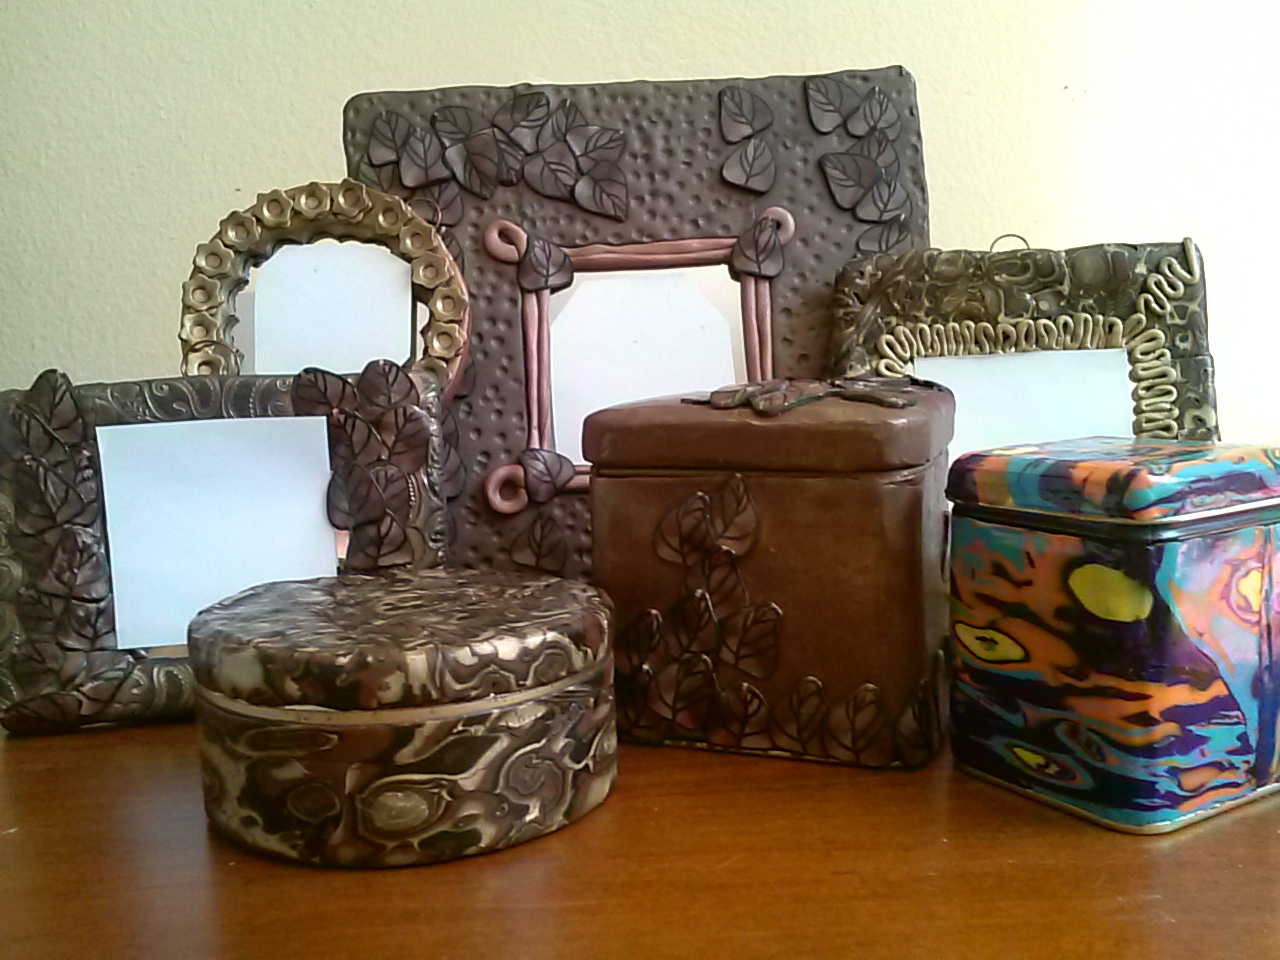
I had planned to put away the polymer clay after my last post, but it turns out I really enjoyed playing with it and instead I went to buy some more…I took advantage of a sale at my nearest crafts store, and bought some clay in black, brown, gold, bronze and copper tones. (Premo Sculpey Accents) I also bought a couple packets of small square and round mirrors ( they were less than three dollars for a pack of like 4, so cute!) I had been thinking about mirrors for a while, and wanted to see if I could make some for my mom’s collection or to give as gifts.
I also wanted to try and see what I could “cover” a few things with polymer clay. I found some old tins that needed a makeover and a couple of other surfaces that I wanted to experiment with (.97 cent wooden frame from Walmart) and decided to start testing my patience and my skills. I have to say I’m quite happy with how things worked out. There’s still room for improvement, but at least I now know how to start and what to do.
To cover the tins, I tried what’s called MOKUME GANE. If you google it, you will find lots of tutorials on how to do it using different materials, like gold leaf, paint, etc. I did a very basic one with two variations of color. I then cut thin slices and put them on another sheet of clay, I ran that through the pasta machine to even it out and then used that to cover the tins. With one of the lids I had lots of fun just piling up slices of clay, just to get an uneven surface…But after I baked it and glazed it with the Future polish, my dear husband pointed put he could see my fingerprints…So I guess it’s better to either work with latex gloves, or to try to flatten and even out the surfaces as much as possible. Or, to not listen to what your husband has to say…hehe


 This is the first one, I know you can’t see my fingerprints on the top of the tin, I thought It looked cool, but my husband didn’t. ;/ So I tried again:


This worked out really well. 🙂
After that, I wanted to try making a cane, but I wanted one where I could see the pattern, not like my previous very “abstract” designs. I was looking around, and found this easy tutorial to make a leaf cane: http://www.beadyeyedbrat.com/sandieleaf2.html And I made my own. I Really liked it, and as you will see, I used it A LOT.

Now, about the mirrors: I knew I wanted small mirrors, so what I did first was use all the leftover clay I had and built frames for them. I then added the mirror. I think they stick pretty well to the clay, but I guess they can be glued with liquid polymer clay or other type of glue. Once I had the frame and the mirror I covered it in different ways and added my beautiful leaves and other accents, like embossing powder and stamps for texture. Finally, I made a loop with jewelry wire and stuck it to the back to be able to hang t hem. After I baked them, I used some fine sand paper to even out any imperfections or to get rid of any extra embossing powder. Since some of the clay has a metallic effect, some of the mirrors look good with a matte effect, so I didn’t have to use any gloss, varnish or floor polish.
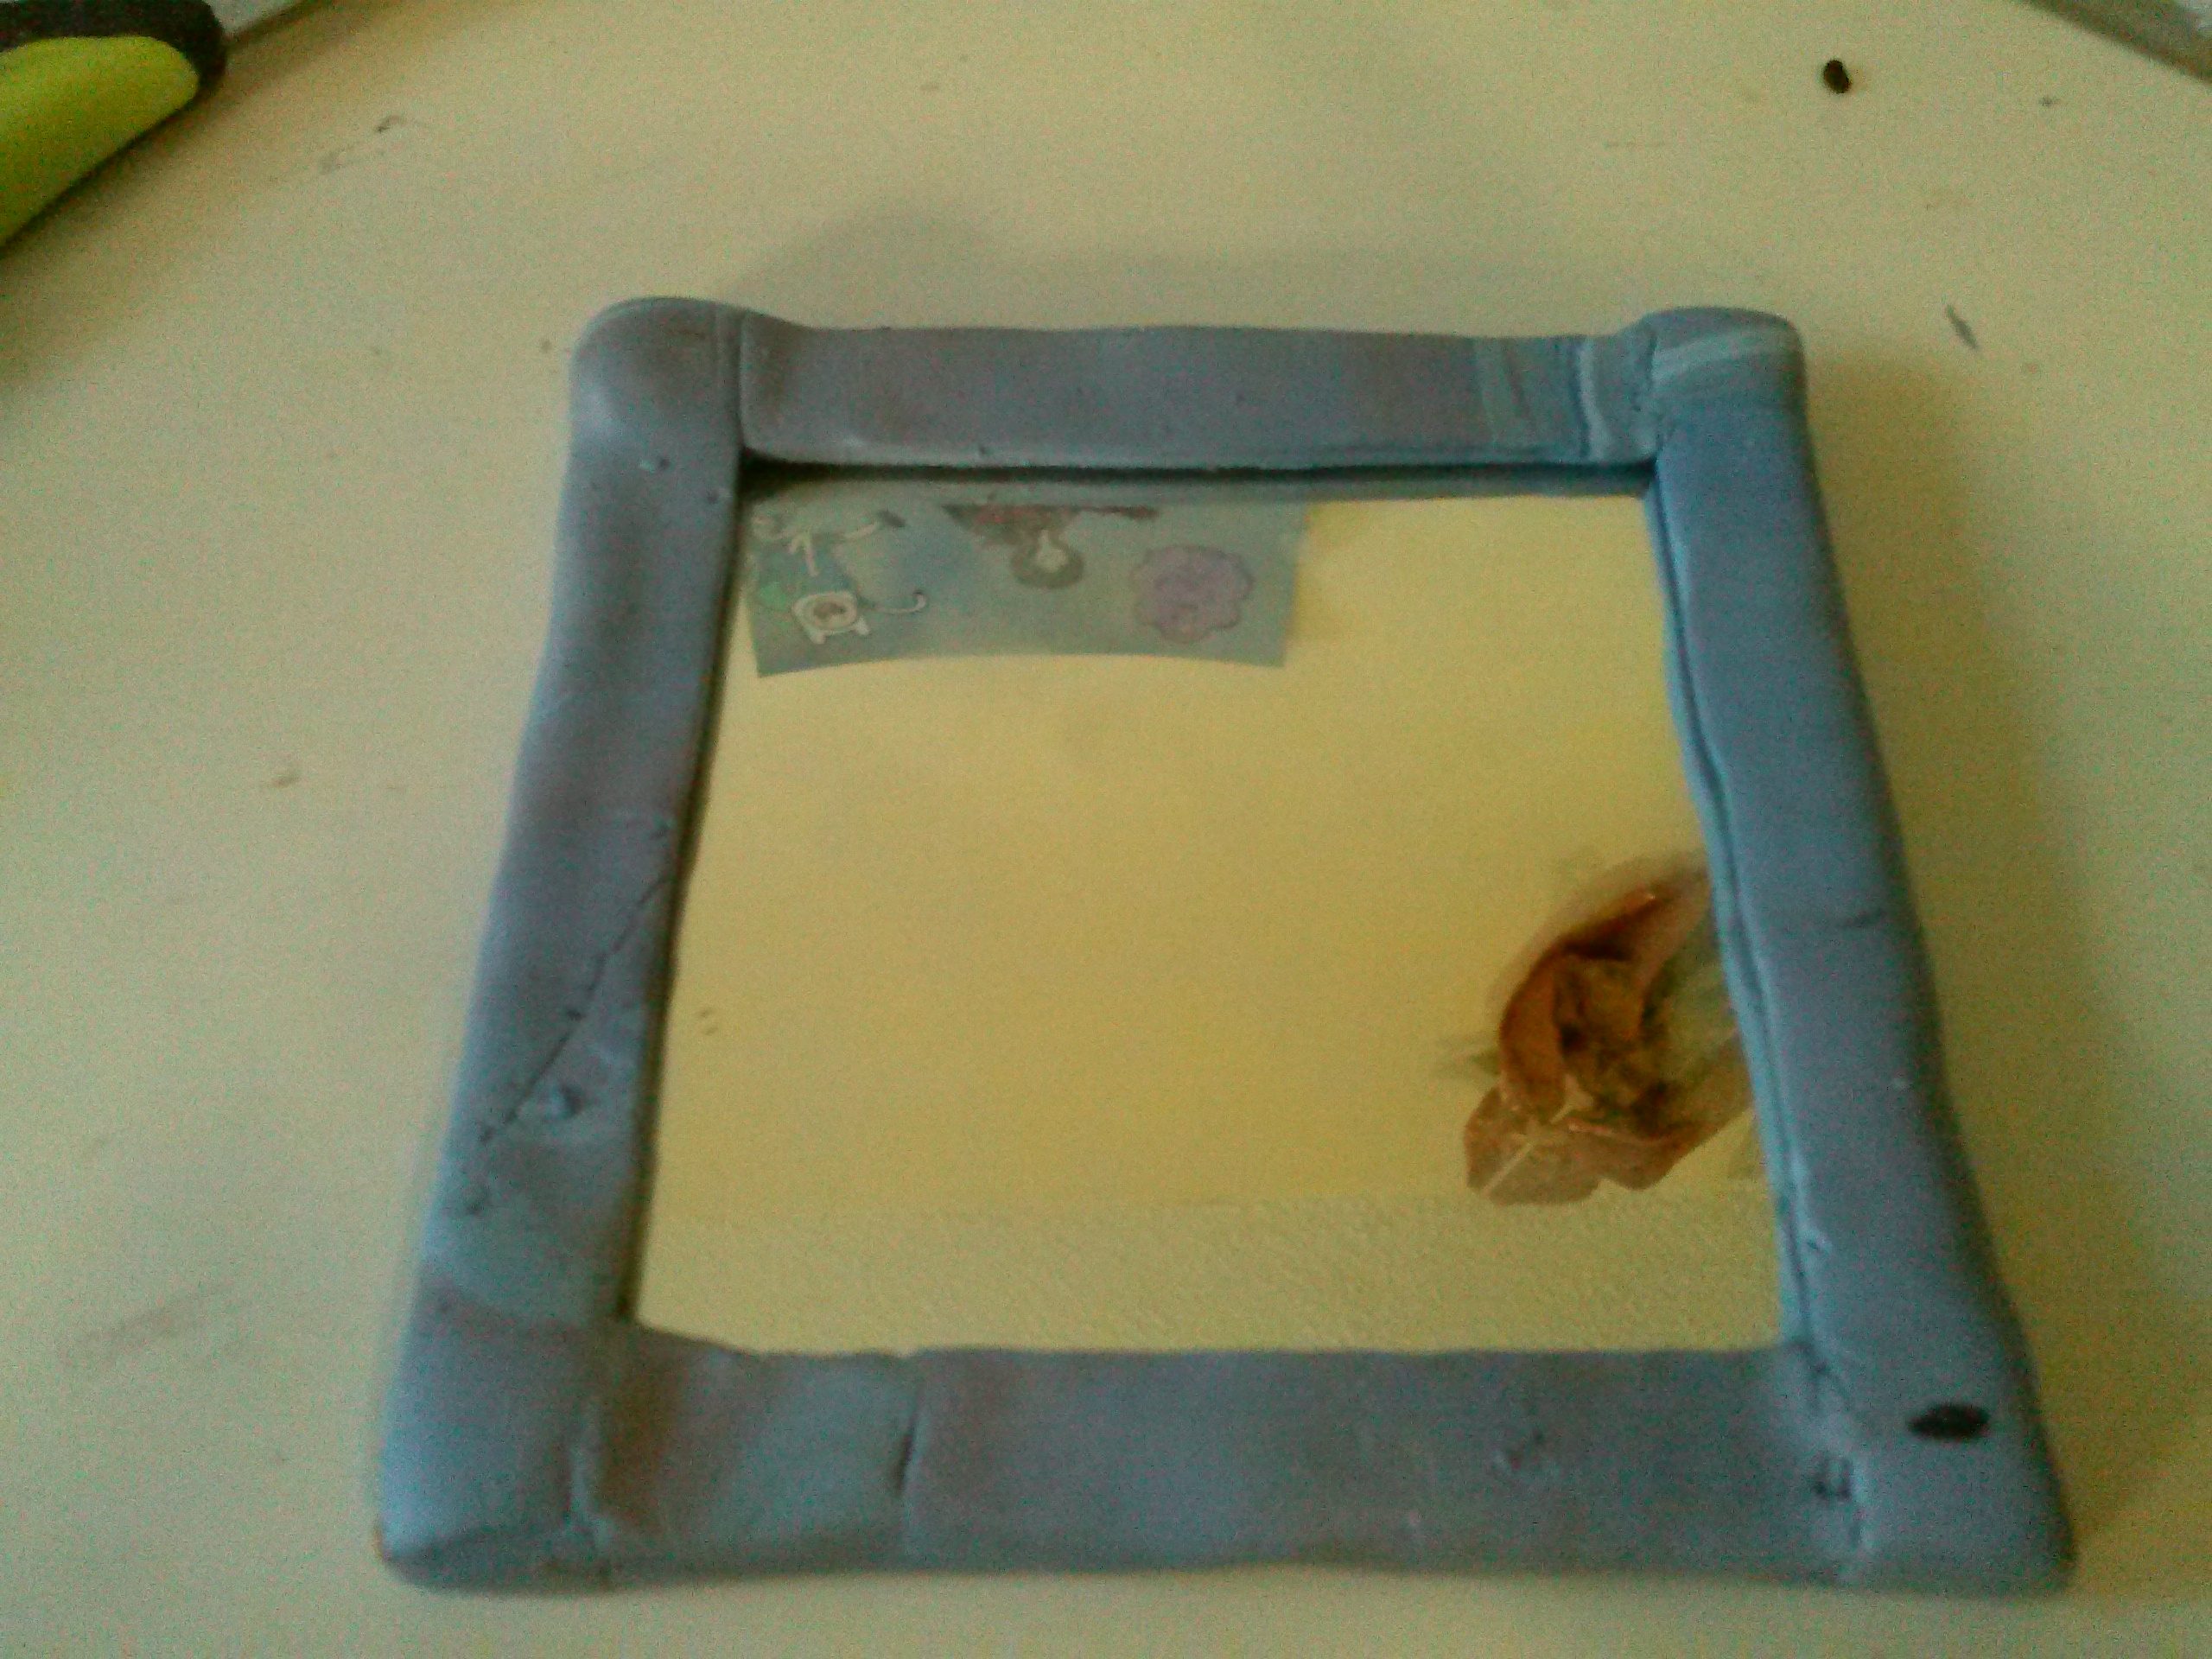


I also had a wooden frame that I wanted to turn into a mirror. After doing some reading I found out that non-porous surfaces are better to use when working with clay, and that some people had trouble when working with wood because the wood expands and the clay can crack or not stick very well. One of the recommendations if one’s trying to cover wood was to either use liquid clay as glue, or to cover the surface with a coat of white glue or acrylic paint or varnish. I diluted some white glue, and with this I covered my frame. I think next time I’m not going to even dilute the glue, because a thicker coat works better and with the diluted glue I had to do several coats and let them dry…
Covering the frame was a bit tricky, and I thought It was not going to work at all. I had to make sure I had enough clay to wrap the whole thing and kinda reinforce the corners, be very careful and work slowly, because It really look like the layer of clay was going to come off and I was gonna get a lot of air bubbles. Still, I kept working on it and after baking it it seems like the clay “shrunk” and adhered well to the surface. I cant see any air bubbles, and It looks really cool. 🙂 I’m glad I did the research before, or I would have been really frustrated. Here’s the final result:


And here are some other pics of the finished work. This kept me busy for a long time and I’m happy with the results. Hope you like them, and enjoy the coming weekend!


